Using Web3 With Hardhat
Introduction
Following the recent compatibility update of Hardhat plugin hardhat-web3-v4, Web3.Js is now available to use as plugin in Hardhat.
This tutorial will guide you through using Web3js as a plugin to interact with the Blockchain.
This tutorial explains how to create a Web3.js + Hardhat project from scratch. The create-hardhat-web3 command line utility was created to automate many of the steps in this tutorial and make it easier to quickly bootstrap a new Web3.js + Hardhat project.
Pre-requisite
This tutorial assumes you have previous knowledge of writing Smart contracts, and are convenient working with JavaScript/TypeScript. You should have NodeJS version greater than v16 installed.
To install dependencies, we will use NPM.
Steps
- Initiate a Hardhat project
- Install required dependencies (including
hardhat-web3-v4) - Write the Smart Contract
- Compile and deploying the contract
- Testing and interacting with the contract
Initiate a Hardhat project
Create a new project folder and navigate into it.
mkdir myproject
cd myproject
Install and instantiate Hardhat in the current project.
npm install hardhat
npx hardhat init
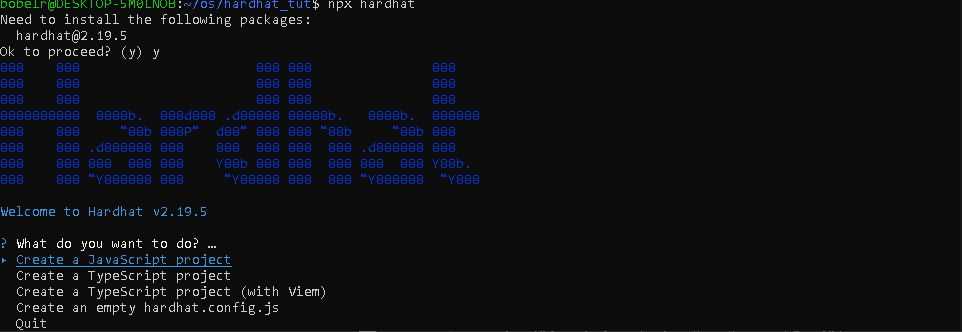
Install required dependencies (including hardhat-web3-v4)
Select TypeScript and Yes for the rest of the options.
You will be prompted to install the required dependencies. Reply yes to complete the installation.
To include the Hardhat-web3-v4 plugin, we will install it via npm.
npm install --save-dev @nomicfoundation/hardhat-web3-v4 'web3@4'
This will add Web3.Js to your project by including it in the 'node_modules' folder. To extend the Hardhat functionality with this plugin, we have to import the web3-v4 plugin in the Hardhat configuration file hardhat.config.ts. Import this at the top of the config file.
import { HardhatUserConfig } from 'hardhat/config';
import '@nomicfoundation/hardhat-toolbox';
import '@nomicfoundation/hardhat-web3-v4'; // <================

const config: HardhatUserConfig = {
	solidity: '0.8.19',
};

export default config;
By default, hardhat-toolbox is added to the file. You will need to explicitly invoke the plugin. This will modify the Hardhat Run-time Environment - HRE and to include both the Web3 class and an instantiated web3 object. With the latter, you get a modified ready-to-use web3 object can comes with an initialized local/Hardhat provider. The object will be available to use anywhere in the project such as testing and deployment files.
Write the Smart Contract
When you start a new project, Hardhat provides a sample Lock contracts. Please refer to the contract in myproject/contracts/Lock.sol file.
  // SPDX-License-Identifier: UNLICENSED
  pragma solidity ^0.8.9;

  // Uncomment this line to use console.log
  // import "hardhat/console.sol";

  contract Lock {
    uint public unlockTime;
    address payable public owner;

    event Withdrawal(uint amount, uint when);

    constructor(uint _unlockTime) payable {
      require(
        block.timestamp < _unlockTime,
        "Unlock time should be in the future"
      );

      unlockTime = _unlockTime;
      owner = payable(msg.sender);
    }

    function withdraw() public {
      // Uncomment this line, and the import of "hardhat/console.sol", to print a log in your terminal
      // console.log("Unlock time is %o and block timestamp is %o", unlockTime, block.timestamp);

      require(block.timestamp >= unlockTime, "You can't withdraw yet");
      require(msg.sender == owner, "You aren't the owner");

      emit Withdrawal(address(this).balance, block.timestamp);

      owner.transfer(address(this).balance);
    }
  }
Lock.sol is a simple timeLock contract capable of accepting any amount of Ether at deployment while expecting one parameter that will be assigned to a state variable when deployed. The withdraw function allows only the address marked as owner to withdraw the total contract balance only if the 'unlockTime' is not in the future.
Compile, test and deploy the contract
- Compile and deploying the contract
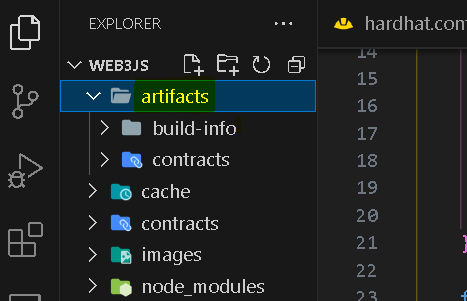
npx hardhat compile
Running the above command will generate a folder called artifacts containing the build information and the compiled contracts. From this directory, we will require the jasonInterface otherwise called the Application Binary Interface - ABI during testing and deployment.
To deploy the contract, we will modify the script/deploy.ts file as shown below.
First, we import the initialized web3 object from hardhat. Next we get the artifacts.
import { web3 } from 'hardhat';
import artifacts from '../artifacts/contracts/Lock.sol/Lock.json';

async function main() {}

// We recommend this pattern to be able to use async/await everywhere
// and properly handle errors.
main().catch(error => {
	console.error(error);
	process.exitCode = 1;
});
Inside the main function, we prepare the deployment using a few of the web3.Js functionalities such as the .utils and .eth modules.
async function main() {
	const currentTimestampInSeconds = Math.round(Date.now() / 1000);
	const unlockTime = currentTimestampInSeconds + 60;

	const lockedAmount = web3.utils.toWei('0.001', 'ether');

	const [deployer] = await web3.eth.getAccounts();
	const lockContract = new web3.eth.Contract(artifacts.abi);
	const rawContract = lockContract.deploy({
		data: artifacts.bytecode,
		arguments: [unlockTime],
	});

	const lock = await rawContract.send({
		from: deployer,
		gasPrice: '10000000000',
		value: lockedAmount.toString(),
	});

	console.log(
		`Lock with ${web3.utils.toWei(
			lockedAmount,
			'ether',
		)}ETH and unlock timestamp ${unlockTime} deployed to ${lock.options.address}`,
	);
}

// We recommend this pattern to be able to use async/await everywhere
// and properly handle errors.
main().catch(error => {
	console.error(error);
	process.exitCode = 1;
});
Running the following command will deploy the Lock contract to a local Blockchain built into Hardhat. We use Web3.Js to talk to the Blockchain to broadcast our smart contract data to the network.
npx hardhat run scripts/deploy.ts
Testing and interacting with the contract
In the previous steps, we compiled and deployed the contract to the local Blockchain network. It's time to test our contract ensuring it performs as expected. Since we used Web3.Js to talk to the Blockchain to broadcast and save our data, we will use same protocol to view and modify the data.
In the myproject/test/Lock.ts file, replace the content with the code below.
import { time, loadFixture } from '@nomicfoundation/hardhat-toolbox/network-helpers';
import { expect } from 'chai';
import { web3 } from 'hardhat';
import artifacts from '../artifacts/contracts/Lock.sol/Lock.json';

describe('Lock', function () {
	async function deployOneYearLockFixture() {
		const ONE_YEAR_IN_SECS = 365 * 24 * 60 * 60;
		const ONE_GWEI = 1_000_000_000;

		const lockedAmount = ONE_GWEI;
		const unlockTime = (await time.latest()) + ONE_YEAR_IN_SECS;

		const lockContract = new web3.eth.Contract(artifacts.abi);
		lockContract.handleRevert = true;

		const [deployer, otherAccount] = await web3.eth.getAccounts();
		const rawContract = lockContract.deploy({
			data: artifacts.bytecode,
			arguments: [unlockTime],
		});

		// To know how much gas will be consumed, we can estimate it first.
		const estimateGas = await rawContract.estimateGas({
			from: deployer,
			value: lockedAmount.toString(),
		});

		const lock = await rawContract.send({
			from: deployer,
			gas: estimateGas.toString(),
			gasPrice: '10000000000',
			value: lockedAmount.toString(),
		});

		console.log('Lock contract deployed to: ', lock.options.address);
		return { lock, unlockTime, lockedAmount, deployer, otherAccount, rawContract };
	}

	describe('Deployment', function () {
		it('Should set the right unlockTime', async function () {
			const { lock, unlockTime } = await loadFixture(deployOneYearLockFixture);
			const setTime = await lock.methods.unlockTime().call();
			console.log('SetTime', setTime);
			expect(setTime).to.equal(unlockTime);
		});

		it('Should set the right deployer', async function () {
			const { lock, deployer } = await loadFixture(deployOneYearLockFixture);

			expect(await lock.methods.owner().call()).to.equal(deployer);
		});

		it('Should receive and store the funds to lock', async function () {
			const { lock, lockedAmount } = await loadFixture(deployOneYearLockFixture);
			const balance = await web3.eth.getBalance(String(lock.options.address));
			expect(balance).to.equal(lockedAmount);
		});

		it("Shouldn't fail if the unlockTime has arrived and the deployer calls it", async function () {
			const { lock, unlockTime, deployer } = await loadFixture(deployOneYearLockFixture);

			await time.increaseTo(unlockTime);
			await expect(lock.methods.withdraw().send({ from: deployer })).not.to.be.reverted;
		});
	});
});
in this file, we performed similar steps as in the deployment script to prepare and deploy the contract using the ABI and bytecode in deployOneYearLockFixture(). To read the owner data from the Blockchain, we used an instance of the deployed contract i.e lock.methods.owner().call().Invoking .call() does not change the state of the blockchain hence no wallet signature is required.
To change the status of the data we previously saved, we have to access the method container for the function (s) we desire and invoke the .send to broadcast our intention to the network lock.methods.withdraw().send({from: deployer}).
When using .send(), you must explicitly provide the sender of the transaction in the from field (in the above example is the address of the deployer account).
To run the test you can use the command
npx hardhat test test/Lock.ts
And you'll get a similar result to this:
/*
Lock
    Deployment
Lock contract deployed to:  0x5FbDB2315678afecb367f032d93F642f64180aa3
SetTime 1739193193n
      ✔ Should set the right unlockTime (884ms)
      ✔ Should set the right deployer (54ms)
      ✔ Should receive and store the funds to lock
      ✔ Shouldn't fail if the unlockTime has arrived and the deployer calls it
*/